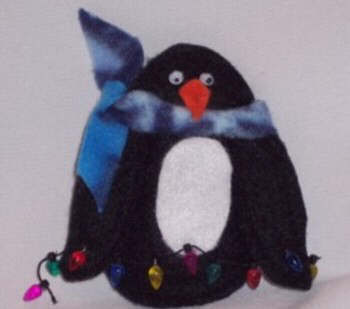
Penguin Ornament
Note: Before printing set your margins to 0 and be sure your header and footers are turned off.
- 4" x 9" piece Black felt
- 2" square white felt
- 5" Long string of lights
- Scrap of orange felt
- 1 pair 5mm googly eyes
- Small amount Fiberfil (stuffing)
- 6" piece crochet or elastic thread
- ½" x 6 ½" piece fleece
- Craft glue
- Hot glue gun & glue sticks
- Black thread & needle or sewing machine
1) Trace and cut 1 belly from white felt.
2) Trace and cut 4 wings and 2 bodies from black felt.
3) Pin 2 of the wings together and sew completely around the outside
edge. Repeat with the other 2 wings.
4) Pin the 2 body pieces together. Sew around the outside leaving a
small opening for stuffing.
5) Stuff the body lightly and sew opening closed.
6) On the front of the penguin, using the hot glue gun, glue one wing on
each side of the body (refer to picture for placement).
7) Tie the ½" x 6 ½" piece of fleece around the neck as a scarf. Put 2
or 3 dots of hot glue under the scarf to hold it in place.
8) On the back of the penguin, thread a piece of crochet thread or
elastic thread thru the head using a needle. Remove the needle and knot
the two ends together. This is the ornament hanger.
9) Cut a beak out of orange felt by cutting a diamond that is
approximately ½" w x 1" long.
10) On the front of the penguin use the craft glue to glue the white
“belly” under the scarf. Glue eyes and beak on for face.
11) Using hot glue, tack the Christmas lights to the wings. Also, tack
the center of the strand of lights to the belly of the penguin.