Tooth Fairy Bag
Sew a tooth bag to keep teeth in under your pillow while you wait for the tooth fairy to pick them up. Free sewing tutorial including full size tooth pattern.
Materials:
- 9 1/2" x 7 1/2" piece of muslin
- 12" piece of thin ribbon (1/8" ~ 1/2")
- Fabric Paint
- Scrap of cardboard 4" x 6"
- Sewing machine
- Thread
- Iron
- Safety pin
- Transfer pencil or marker
- Cut a piece of muslin 91/2" x 7 1/2".
- Holding the material so that the 9 1/2" section is the width, measure over 4 3/4" (this should be the center ) and 1 1/4" down from the top. Using this mark, make a button hole which is approximately 3/8" to 1/2" long. The button hole should be going straight up and down and should head away from the top 1 1/4" of the material.
- With right sides together, stitch across the bottom and up the side.
- You have 2 choices on how to finish the casing: Using a serger, finish the raw edge then fold the top 1" to the inside and press. Stitch close to the finished edge. or Fold 1/4" to the inside and press then fold 3/4" to the inside and press. Stitch close to the edge forming a casing that is approximately 3/4".
- Right side out your bag. Attach a safety pin to one end of the ribbon and use the pin to thread the ribbon through the casing at the top of your bag. You will enter and exit the casing through the buttonhole you made.
- Once the ribbon has been threaded through the casing, remove the safety pin and knot the two ends of the ribbon together.
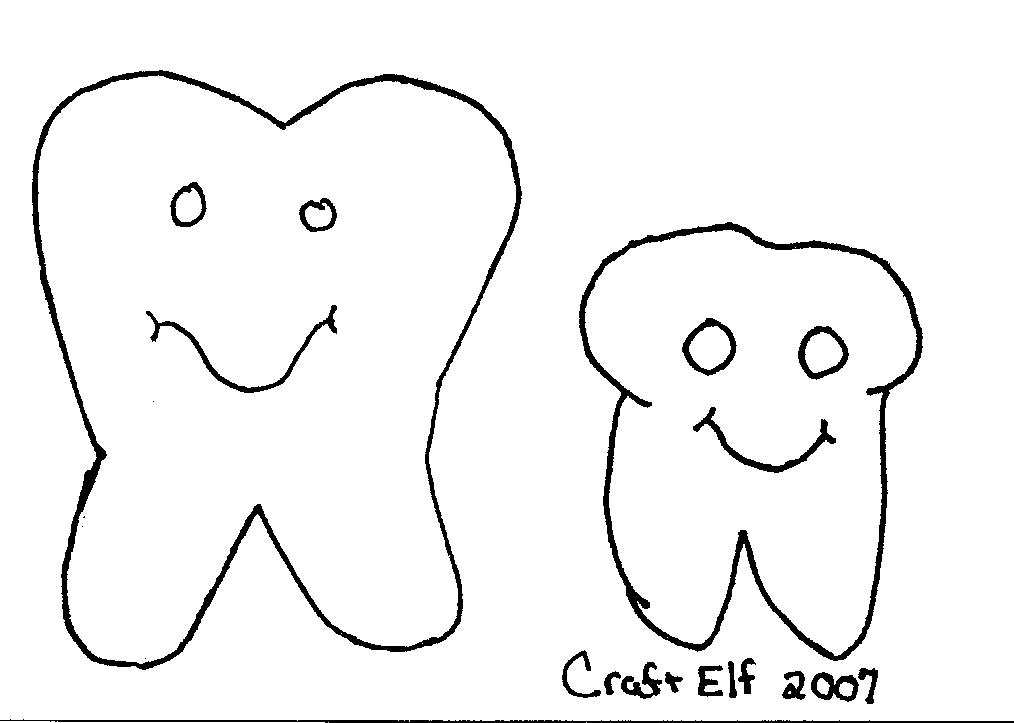
- Now it's time to decorate your tooth bag. To do this, print out the tooth
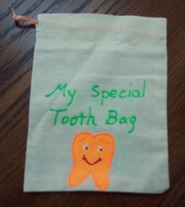
 patterns and trace them with a transfer pencil or transfer marker. Place the traced image face down (with the transfer ink against the bag) on your bag where you want the tooth to be and iron it with a dry iron. Do not move the iron around - instead lift it - move it - then press. The longer you hold the iron on the image, the darker it will be. On one side of my bag, I put the large tooth and on the other side of the bag, I put the small tooth which leaves room for you to personalize. I like to write the child's name if I know who the bag will belong to. For example "Chrissy's Tooth bag" or you could write "My Special Tooth Bag".
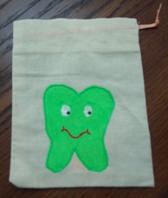
 - Paint both sides of the tooth bag letting the first side dry completely before proceeding to the second side. Before painting, place a piece of cardboard inside the bag so the paint doesn't go through to the other side and leave it in place until the paint dries. To paint each tooth, I squeeze some paint on an old plastic lid or paper plate and brush the whole tooth area with fabric paint then outline the tooth with the paint in a squeeze bottle. I also use the squeeze bottles to make the face and to write the words.