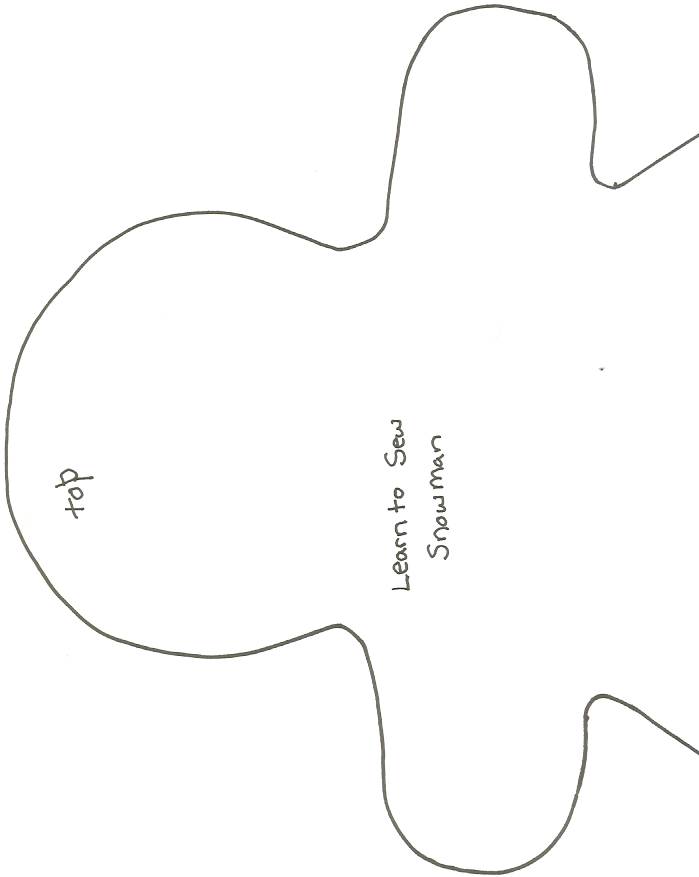
Learn to Sew Snowman

Teach a child to sew with this crafty snowman project! Includes tips to make sewing your snowman easier. Includes full size pattern.
Materials:
- Two 10 ½" x 13 ½" pieces of white felt
- 2 Large safety pins
- Yarn needle
- 3/16" Hole punch
- One 3/8" x ½" cork stopper
- Orange craft paint
- Fleece 6" x 9" piece and 20" x 1 3/4" piece
- Small clear hair elastic or piece of string
- 5 circles punched from black craft foam using a standard size hole punch
- White Yarn
- 3 Buttons
- Blush
- Polyester Fiberfil (stuffing)
- Paint Brush
- Two 10mm eyes
- Paint the cork orange and set aside to dry. It may be helpful to stick a toothpick in the wide end of the cork to hold the cork while you paint it. The other end of the toothpick can then be put into a piece of Styrofoam or poked into a box while the cork dries.
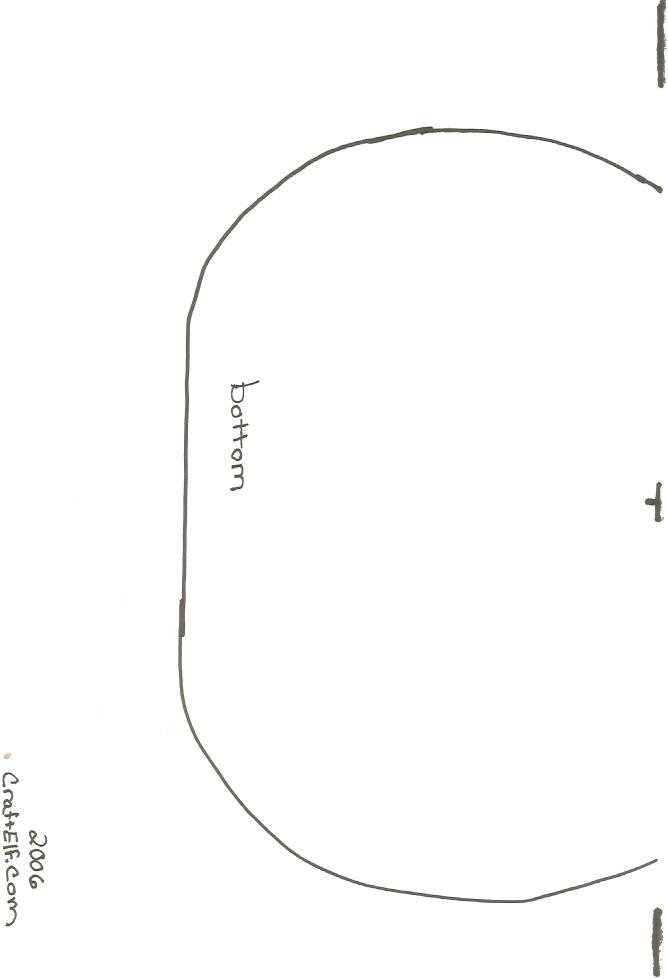
- Trace and cut out 2 snowman shapes from the felt. Due to the size of the pattern it will print on two pages. Simply line up the edges and tape together to form the complete pattern.
- Being careful to line up both felt snowmen evenly, pin them together with the two large safety pins*.
- Using the 3/16" hole punch, make holes around the outside edge of the snowman thru both layers approximately 1/4" in from the edge and ½" apart.
- Thread the yarn needle with white yarn and knot one end. To start so the knot won't pull thru, from between the 2 layers of the snowman come up between 2 sets of the punched holes.
- Using the holes, hand sew with an over edge stitch (Come up from the bottom into one of the holes then bring your needle up from the bottom again into the very next hole.)
- Stop sewing when you have about 2 ½" left to sew. I find it helpful to take the needle off the yarn while stuffing your snowman so it doesn't fall off and get lost.
- Lightly stuff your snowman being sure to spread the stuffing into the head, arms and bottom evenly.
- Re-thread your needle and resume sewing.
- When you finish sewing, knot the yarn and take a couple more stitches before cutting the yarn. (This helps hide the end of the yarn.)
- Put a little blush on your snowman where the checks will be.
- With right sides together, match up the two 6" ends of your 6" x 9" piece of fleece and sew a seam 1/4" from edge.
- Right side out. At one of the open ends, gather the fabric in your hand and wrap the small hair elastic around it. (If you don't have a small clear hair elastic, use a piece of string, crochet thread or heavy weight thread and tie it tightly around the gathered fleece.)
- Cuff the other end - this is your snowman's hat. Place it on his head.
- Tie the 20" x 1 3/4" fleece around the snowman's neck as his scarf. (Optional - cut slits in the ends of the scarf as fringe)
- To make the face, glue on the eyes, cork nose (be sure it's dry) and the five craft foam dots as the mouth.
- Glue the buttons down the front of your snowman.