Craft Foam Easter Chick Magnet
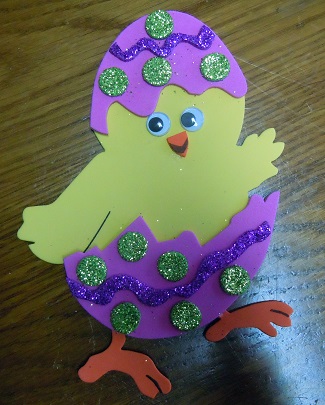
Ever wonder what is inside each decorated Easter egg? Well it is a baby Easter chick of course. With some craft foam and glitter foam you can make this adorable chick in an egg - an Easter egg that is. Use your imagination and make this chick your own style. Consider replacing the glitter foam designs with designs made from glitter glue or glitter paint in squeeze bottles. Change up the egg color. Reduce or enlarge the pattern to make him exactly the size you want.
Craft supplies:
- Craft foam; yellow, pink and orange
- Glitter foam; green and purple
- Two 12mm wiggle eyes
- Fine tip or ultra fine tip black permanent marker
- Tacky glue
- Piece of magnet at least 1" long
- Trace and cut out one chick from yellow craft foam. Use the black marker to draw a line between the chick's right wing and body. Attach a piece of magnet to the back side of the chick's head.
- Trace and cut out both feet from orange craft foam. Use a black permanent marker to make toe lines as pictured. Cut a small triangle beak from orange craft foam and draw a thick V to give it the appearance of being open.
- Cut both egg sections out of either pink or light purple.
- Cut 10 circles out of green glitter foam and cut the squiggle lines out of purple glitter foam.
- Glue the two egg sections onto the chick and glue the two legs to the back of the lower egg section.
- Glue the two eyes below the top egg section and glue the beak just below the eyes.
- Glue the purple squiggles and the green dots onto the egg shells as decorations.
You will need Acrobat Reader to view the pattern as it is a PDF. ![]()