Styrofoam Pumpkin Decoration
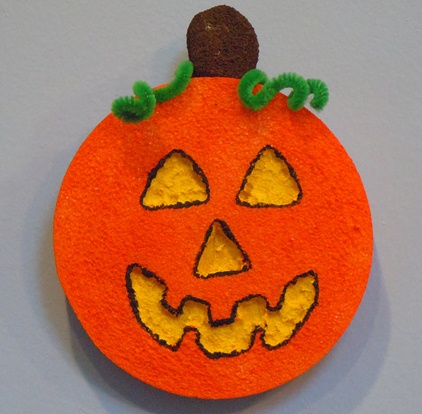
Kids will love to paint this Styrofoam pumpkin. It is a simple Halloween craft that will become a cherished Halloween decoration that you can use year after year.
Craft Supplies:
- Styrofoam disk; 5" diameter, 3/4" thick
- 1 1/2" Styrofoam ball
- Acrylic paint; yellow, orange, black and brown
- Hot glue gun
- Green pipe cleaner
- Paint brushes
- Twist tie
- Stapler
- Squish a 1 1/2" Styrofoam ball into a stem shape that is the same thickness as the disk. Paint this stem brown and set aside to dry.
- Using a pencil, lightly draw an outline of the facial features.
- Use the eraser end of a pencil to press down on the Styrofoam inside the pencil lines to "indent" the facial features. Use the end of a skinny paintbrush to get into small areas like the corners.
- Paint inside the indented areas yellow. Paint the rest of the surface and edge orange. Let dry then use a fine line paintbrush and black paint to outline the face.
- Hot glue the stem to the top of the pumpkin. This should be done by an adult.
- Fold the green pipe cleaner in half and twit the folded end together about 1 1/2" up from the fold.
- Place the pumpkin face down on your work surface and staple the green pipe cleaner (about 3/4" up from the fold) to the back of the disk just below the stem. Fold the end of the pipe cleaner up over the staples.
- Turn the pumpkin over and bring one end of the pipe cleaner to the left of the stem and the other end to the right of the stem. Curl both ends by wrapping them around a pencil then sliding the pencil out.
- Lay the pumpkin face down on your work surface again and attach a twist tie as a hanger. To do this, twist the straight end of the twist time together and staple this piece to the back of the disk. Fold the ends up over the staples. When you twist the ends together, let the rest of the tie form a loop. You can hang your pumpkin up by this loop.
Tip: If you prefer, you can outline the facial features using a black permanent marker instead of paint or skip this step all together.