Cork Pumpkin Coasters
Craft with cork!
Make a pumpkin drink coaster from cork. Simply cut out the pumpkin and paint. Pumpkin coasters are a unique decoration for Halloween as well as a great way to protect your tables from the dreaded stains left by drinks. Everyone will enjoy sipping hot spiced cider, hot chocolate, coffee or tea when they have a Halloween pumpkin coaster to place their mug on.
Materials:
- Cork that is approximately 3/8" thick (5mm)
- Craft knife
- Black pen
- Orange, black, green and brown acrylic paint
- Paint brush
- Self healing cutting mat or wooden cutting board
- Trace the pumpkin pattern onto the cork using a pen.
- Using a craft knife, cut out the pumpkin from the cork. The cutting should be done by an adult and make sure to protect your work surface with either a self healing mat or a wooden cutting board.
- Draw the face, leaves and accent lines on to the cork pumpkin with a black pen. If you prefer to trace the details from our pattern instead of free handing it, you can use graphite transfer paper to trace the details onto the cork. Do this by placing the graphite paper down on the cork pumpkin with the inky side face down. Lay our pumpkin pattern on top of it and trace the lines.
- Using brown acrylic paint, paint the stem and the area around the stem.
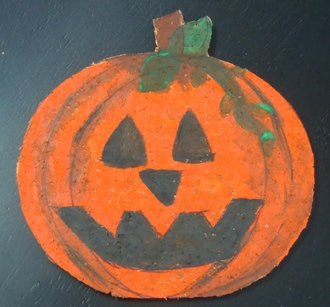
- Paint the pumpkin orange. Then paint the mouth, eyes and nose black. Paint the leaves and vine green. Add a few drops of water to a couple drops of brown paint to make a thin watery paint. Use this to paint over the accent lines on the pumpkin as shown in the picture. Let dry completely.
Note: Not recommended for cold drinks that are sweating as the water could penetrate through the cork.
Idea: Enlarge the pattern and make a hot pad to protect your table from hot holiday dishes.
| You will need Acrobat Reader to view the pattern as it is a PDF. |