Snow Berry Ornament
Learn how to make ornaments in minutes!
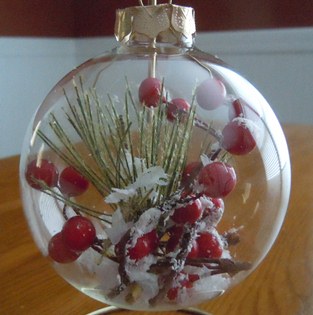
Do you need to make a bunch of Christmas ornaments but don't have much time? Nothing can be more simple than our snow berry ornaments which are made from clear glass ornaments.
Tip: It is much easier to get items into the ball then it is to take them back out so measure your items before you add them to your ball to be sure they will fit.
Craft Supplies:
- 3" Clear glass ball ornament
- A piece of artificial greenery (that looks like an evergreen and fits inside the ball)
- Small amount of fake snow
- Christmas berries, the type you find in the floral department. They can be on a strand of their own, on a Christmas pick or on a bunch of flowers.
- Long tweezers, a chop stick or a pencil
- Remove the top from a clear glass ball ornaments and set it aside.
- Carefully insert a branch of berries into your ornament. Use either a pair of long tweezers, a chop stick or even a pencil to move around the berries and arrange them how you like them.
- Next, add a piece of greenery. I chose a piece that looked like a long needle pine. If it is too big for your ornament, use a pair of wire cutters to cut it to the right size.
- Add two or three pinches of fake snow. Shake the snow around a bit until it settles the way you want it.
- Rearrange any of the items inside the ball with a pair of tweezers/chop stick/pencil.
- Replace the cap and hang the ornament on the tree.