Gingerbread Houses
Click on one of the following links to bring you directly to that category:
- Gingerbread Photo Gallery
- Choosing a Recipe
- Preparing the Pattern
- Baking the House
- Preparing the Icing
- Building the House
- Making a Larger House
- Decorating the House
- Wrapping your House
- When baking for a large crowd
- Submitting a picture of your completed house
| Choosing a Recipe
First, you will need to choose a gingerbread recipe. When I first started making gingerbread houses, I used a boxed gingerbread mix. They tasted fine and were quick and easy but became costly when making houses for a large group. The mixes may have changed a bit our the years but at the time, one mix would make two individual size houses. I now make my gingerbread using the recipe in the New Cook Book (Better Homes and Garden)
|
||||
| Preparing the Pattern
When I make my houses, I use gingerbread house cookie cutters which make it much quicker and easier. Gingerbread House Bake Set
|
||||
| Baking the House
Bake your gingerbread on an un-greased cookie sheet using the time and temperature specified in your recipe. If you bake a larger house, you may need additional baking time. The gingerbread is done cooking when the edges are firm. It is important to cool you cookies for two minutes before removing them from the cookie sheet but be sure they do not cool completely before removing them or it will become difficult to get them off the pan and they may crack. Let the gingerbread cool completely on a wire rack and if possible leave them to cool and harden slightly on the rack for a couple of hours. If your cookies are too soft, the house will collapse when you try to decorate it. If you feel the cookies are too soft, leave them on the wire rack for a longer period of time and they will harden a bit.
|
||||
| Preparing the Icing
As with the gingerbread, there are many recipes for icing. I use the following recipe and have had very good luck with it. Be careful to measure accurately as the proper icing consistency is very important. Royal Icing
Beat all ingredients until icing forms peaks which is 7-10 minutes at low speed with a heavy-duty mixer, or 10-12 minutes at high speed with a hand-held mixer. (Makes 3 cups) * I recommend Wilton Meringue Powder Once your icing is made, you must keep it covered with a damp cloth until you are ready to use the icing to keep it from drying out and hardening.
|
||||
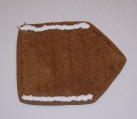
| Building the House
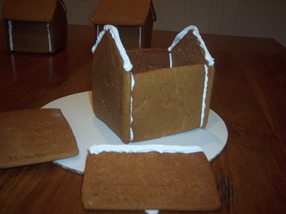
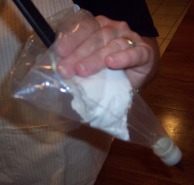
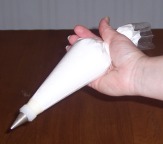
When you build your house you will need to either build it on a base or make it then attach the house to a base. Wilton 12-Inch Cake Circle, 8-Pack Each house requires the following cookies: 2 sides, 2 roof sections and 2 ends. Fill a pastry bag** with the icing and attach a large piping tip. I like to use a #4 or larger tip. The outside or right side of the cookies should be the side that was face up during baking. Place one of the end cookies on your work surface with the wrong side facing up. Squeeze a line of icing just inside each edge as pictured.
Now, place your remaining end cookie on your work surface with the Let this set for about a half hour allowing the frosting to harden and the house to become more stable. Be sure to keep your decorating (pastry) bag covered with a damp cloth during this waiting period to keep the frosting from drying out and hardening.
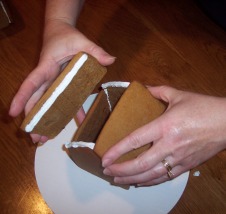
After your walls have had a chance to set, it is now time to add the roof. Before attaching the roof, run a bead of frosting up and over the peak of each end piece. Also, run a bead of frosting along one of the longer sides of one roof cookie on the back side of the cookie. This long straight edge will be at the peak when assembled. Carefully place the two roof pieces on top of the house as shown. When you do this, gently but firmly press the roof sections into the frosting on the peaks and butt the long edge of one of the roof sections up against the frosting line on the other roof section.
Let the house set for a few hours or overnight if possible to let the frosting harden. This will make your house much more sturdy when you start to decorate it.
|
||||
| Making a Larger House
If you are making a larger house, you can either find a larger scale pattern, increase the size of our pattern when you print it or design your own pattern. When assembling a larger size house, you may need to place cans (full vegetable cans or whatever you have on hand) against the house to hold the walls in place until the frosting sets up. Also, on larger houses give the frosting a couple of hours to harden before adding the roof. |
||||
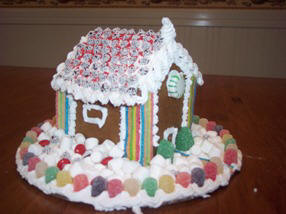
| Decorating the House
Now comes the best part . . .decorating your gingerbread house. When our family members and friends all get together to decorate our gingerbread houses, we have 30 - 40 people ages 1 - 76 all decorating their own individual house at the same time. To accommodate this large number of people, we place a disposable bowl filled with frosting between every two people and give each a plastic knife (for easy clean up). Generally we each frost our roof first using the knife and press candies into the frosting covered roof to decorate it. Next, we either use the knife to apply frosting to individual pieces of candy and stick them on the house or we use one of several decorating (pastry) bags filled with frosting to attach the candies. Usually we have one bag of frosting for every 5 or 6 guests to share. The bag of icing can be used to make many designs including icicles hanging from the roof. It can also be used to make windows and/or doors on your house. See the additional ideas section for other ways to make windows. The sky is the limit to the many types of candy you can use to decorate your house. If you plan to decorate the house and keep it for yourself to eat then choose the types of candy you enjoy eating. Below are some suggestions on candy types and ways to use them. All candies should be unwrapped prior to attaching them to the house.
Additional decorating ideas: If you want to make cut out windows use a knife to cut them out of the raw dough Before baking. I recommend putting the cookie on the cookie sheet before cutting the window as it is more delicate to move after the window is cut. If you want stained glass windows, cut a window out of your dough before baking. Crush some Jolly Rancher hard candies by placing them in a food safe plastic bag (freezer bags work best) and using a rolling pin or meat tenderizer crush them. It is a good idea to place a wooden cutting board under the candies before hitting them with the meat tenderizer. Next, fill in the window area with the crushed candies and bake as you normally would. Experiment by adding more than one color hard candies to each window. |
||||
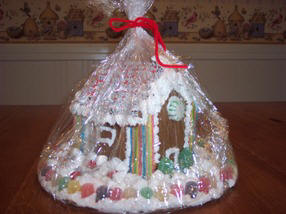
| Wrapping your House:
When the gingerbread houses are completed, we wrap each house individually by crisscrossing two sheets of plastic wrap (make sure they are long enough to reach up and over the house). Then place the house on top of where the two sheets intersect. Pull the four ends of the plastic wrap up and over the house and gather them together. Tie the ends securely with a ribbon or yarn. If you have to transport the houses, hold the gathered plastic wrap in one hand and place your other hand under the base of the house.
|
||||
When baking for a large crowd the following may be helpful:
|
||||
| Submitting a picture of your completed house:
We are in the process of setting up a photo gallery of completed Gingerbread Houses for our guests to enjoy. If you would like to have a house you decorated added to our photo gallery, please e-mail us the photo along with your first name, city, state and if a child decorated the house - their age. Please send the picture of just the house. We reserve the right to crop out some of the background allowing us to focus on the house. |
||||
|
Click here to view our Gingerbread Photo Gallery. Gingerbread House Pattern in PDF Format |
||||
|
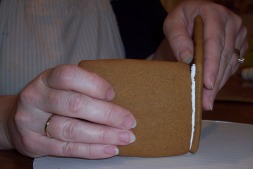 Carefully stand this piece up and butt the end of one side piece up against each of the frosting lines you squeezed out.
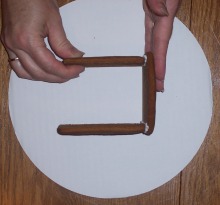
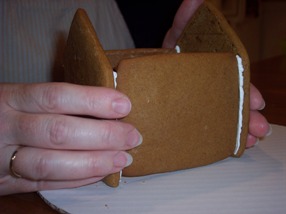 wrong side facing up. Squeeze out two lines of icing as you did on the first end piece. Carefully stand this end piece up and butt it up against the two side pieces which are already attached to the first end cookie.