Description
Reindeer Sewing Pattern ~
With the free rudolph ornament pattern and sewing instructions provided below, you can make a tree full of reindeer ornaments for yourself or to give as gifts.
Materials and Supplies
Craft Supplies:
- Dark brown felt; 8" x 4"
- Tan felt; 10" x 5"
- Powdered blush
- Two 10 mm googly eyes
- 1/4" or 7mm red or black pompom
- 6" piece of pipe cleaner
- Tacky glue
- Polyester Fiberfill (stuffing)
- Common pins
- Elastic thread, 8" piece
- Needle and thread (dark brown & tan)
- Sewing machine (optional)
Craft Instructions
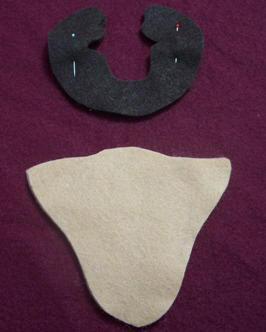
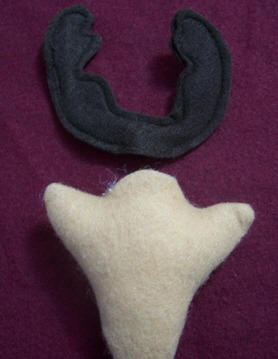
 Cut out two antlers from dark brown felt. You can either trace the antlers onto the felt with a white dress makers pencil or pin your pattern onto the felt and cut around the pattern.
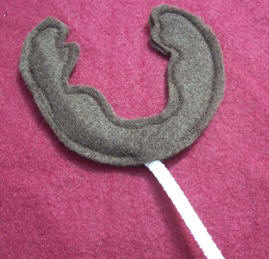
- Using dark brown thread and with wrong sides together, pin the two antler pieces together and topstitch around them close to the edge but in enough that you are sure to catch both layers of felt in the stitching (approximately 1/8" to 1/4" from edge). Leave the small section between the two Xs open. (Do not stitch between the two Xs)
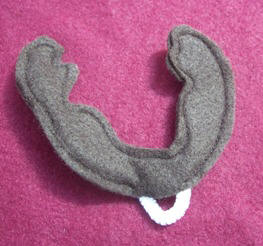
- Insert a 6" piece of pipe cleaner into the antlers through the opening you left.
- Cut out two heads from tan colored felt.
- With right sides together, stitch around the head leaving a a 1 1/4" opening at the top center of the head. Clip curves and right side out.
- Stuff the head section with polyester fiberfill (stuffing).
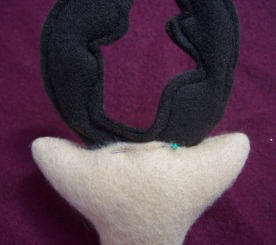
- Insert the open end of the antlers into the opening in the top of the head. Fold the raw edge of the tan felt to the inside of the head. Pin in place and hand stitch the antlers to the head.
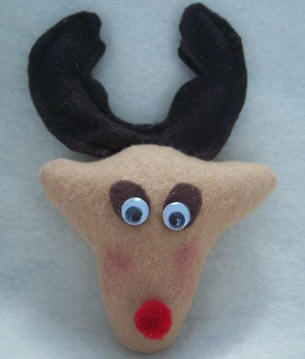
- Cut two eyelids from dark brown felt. Glue them onto the reindeer's face as pictured and glue the googly eyes on top.
- Glue a pompom on as a nose.
- Brush the cheeks with powdered blush.
- Once the glue is dry, thread a piece of elastic thread through the back of the reindeers head close to the antlers. Pull the ends even and tie the ends together in an overhand knot. This is the ornament hanger.
Hint: If you want to make multiple ornaments, trace the pattern onto craft foam or cardboard as it will last much longer than a paper pattern and it is easier to trace around.
|
|
|
You will need Acrobat Reader to view the pattern as it is a PDF. |
| Printable Instructions | ||
|
||
| Back to Christmas | ||
| Back Sewing | ||
| Back Intermediate |