Description
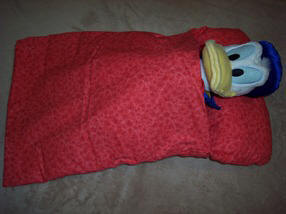
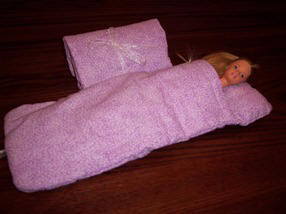
Our sleeping bag is quick to sew and can be used for your favorite stuffed animal or an 18" doll. We've also included instructions to adapt this sleeping bag for 11 1/2" fashion dolls.
Make these smaller sleeping bags as stocking stuffers or Easter basket fillers. They also make a great add on when giving a Barbie doll as a gift.
Materials and Supplies
Craft Supplies:
- Fabric
- 1 yard ribbon
- Batting
- Polyester Fiberfil (stuffing)
- Iron
- Sewing Machine
Craft Instructions
Before you Start:
For the larger sleeping bag, use a 1/2" seam allowance and for the smaller sleeping bag use a 1/4" seam allowance.
I find it helpful to first make a pattern out of poster board. To make the pattern, you need to cut one rectangle 15" x 8" (6" x 3 1/2") then round off two of the corners on one of the long sides. Fold the rectangle in half when you cut the corners so they come out the same. This is the pillow piece. Now cut a rectangle that is 15" x 25" (6" x 13 1/2"). At one end, lay the small rectangle on top of the large one so it is lined up evenly at the edges. Trace the rounded corners onto the large rectangle. Put the small one aside and cut out the corners on the large rectangle. You now have the body pattern.
- Cut one pillow piece from fabric.
- Cut 3 body pieces from fabric and cut 1 body piece from batting.
- Fold under and press 1/2" on the long straight edge of the pillow section.
- Place one of the body sections flat on your work surface face-up.
- Lay the pillow section, face-up on top of the body section being sure to line up the rounded corners. Pin in place then baste stitch 1/4" from the edge leaving turned under edge un-sewn. Remove pins.
- Lay another body piece on top of the first one. Be sure the bottom corners are lined up then mark this piece where it comes to the straight edge of the pillow.
- Remove this piece from the stack and at the mark you made, fold the top end (the end with the rounded corners) to the inside (wrong side) and press.
- Now, lay this face-up on top of the body piece that has the pillow section attached. Line up the bottom corners and the sides and pin in place. Baste along the sides and bottom. Do not sew across the folded edge.
- Fold your ribbon in half and sew the folded edge of the ribbon to the center of the bottom edge (opposite the pillow) of the body section you were just working on. Temporarily pin the loose ends of the ribbon to the center of this fabric so it doesn't get in the way while you finish the sleeping bag.
- Lay the piece of batting on your work surface. Place the section with the pillow attached face-up on top of the batting. Lay your final piece of body fabric upside down on top of the other layers. Pin through all sections. The ribbon should be sandwiched between the two layers of fabric.
- Starting in the middle of one of the long sides, sew around leaving an opening for turning. Clip corners and trim the batting close to the stitching.
- Right-side out and hand stitch the opening closed.
- Unpin the ribbon.
- Lightly stuff the pillow with Fiberfil and machine stitch across the open edge of the pillow going through all the layers.
- To roll up the sleeping bag, start at the pillow end and roll. Then, wrap the ribbon around the sleeping bag and tie it in a bow.