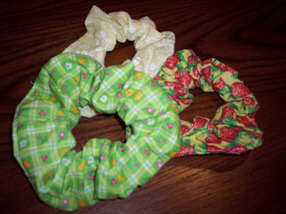
Description
Learn to sew hair scrunchies from fabric to match all your outfits!
Place several in a celephane bag and give as a gift.
Materials and Supplies
Craft Supplies:
- Fabric 22" x 4"
- Elastic 1/4" x 9"
- Thread
- Sewing machine or needle
- Scissors
- Safety pin
- Common pins
Craft Instructions
- Cut a piece of fabric 22" x 4"
- Fold the fabric in half lengthwise with right sides together and pin in place.
- Starting approximately 1" from one end, sew the side seam using 1/4" seam allowance and stop sewing about 1" before you reach the other end. You now have a tube.
- Right side out the tube. An easy way to do this is to attach a safety pin to one end, be sure the pin is closed, and push the pin into and through the tube. The material will follow the pin and it will then be right side out.
- Now, you have to sew the two 4" ends together. To do this, pin the ends with right sides together and sew across the edge using a 1/4" seam allowance.
- Attach a safety pin to one end of the elastic being sure it is securely closed. Thread the pin through one side and back out. You can either hold the other end of the elastic so it doesn't get pulled inside or use a second safety pin and attach it to the opening of the scrunchies.
- Remove the safety pin(s) and sew the two ends of the elastic together.
- Push the elastic inside. It is now time to close up the opening. You can do this either by hand stitching the opening closed or by top stitching the opening closed. In either case, be sure to tuck the raw edges to the inside before sewing.
Idea: If you are making scrunchies as a gift for someone, an attractive way to give them is to put several in a clear cellophane bag and tie it closed with ribbon. Another great idea when giving as a gift is to make one scrunchie for each month of the year such as January - Snowflake; February - Valentines; March - St. Patrick's Day; April - Easter; May and June - flowers; July - patriotic; August - Tropical; September - school or fall print; October - Halloween; November - Thanksgiving and December - Christmas.