Description
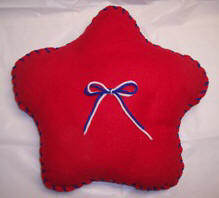
Fun and simple, this stuffed Star pillow made from felt is a great project for teaching children to sew. Complete crafting instructions and full sized star pattern included.
Materials and Supplies
Craft Supplies:
- Two 15" squares felt or one 15" x 30" piece felt in red, white or blue
- Yarn - in contrasting color to felt
- 2 large safety pins
- Yarn needle
- 3/16" hole punch
- Polyester Fiberfil (stuffing)
Craft Instructions
- Trace and cut out 2 star shapes from the felt. Due to the size of the pattern it will print on four pages. Simply line up the edges and tape together to form the complete pattern.
- Being careful to line up both felt stars evenly, pin them together with the two large safety pins.
- Using the hole punch, make holes around the outside edge of the star approximately 1/4" in form the edge and ½" apart.
- Thread the yarn needle with yarn and knot one end. From between the two layers come up between two sets of the punched holes to secure the knot before you start sewing.
- Hand sew with an over edge stitch (come up from the bottom then bring your needle up from the bottom again into the very next hole).
- Stop sewing when you have about 2 ½" left to sew. I find it helpful to take the needle off the yarn so it doesn't get lost while you stuff your star but there is no need to knot the yarn at this point.
- Lightly stuff your star being sure to spread the stuffing into each point in the star.
- Re-thread your needle and resume sewing.
- When you have finished sewing, knot the yarn and take one or two more stitches before cutting the yarn (this helps hide the end of the yarn)
- Optional - Thread 2 colors of yarn on the needle. Take one stitch (go in and back out with the needle) in the center of the pillow. Remove the needle and tie a bow with the yarn.
*If instructing children on sewing, be sure both pins are on the same side. Tell them to keep the safety pins facing the ceiling and always bring the needle up thru the next hole from the bottom. This avoids a lot of twisted yarn.