Description
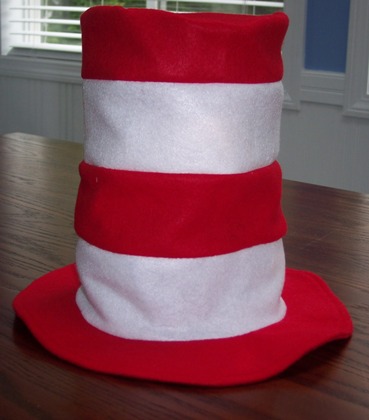
Learn to sew this Cat in the Hat style felt hat. What a great item to wear to celebrate Dr. Seuss day! Change the colors to green and white and wear it for St. Patrick's Day.
Materials and Supplies
Craft Supplies:
- Red felt - 3/4 yard (36" wide)
- White felt - 1/4 yard (36" wide)
- Sewing machine
- Scissors
- Iron
All seam allowances should be 1/2". Please refer to our Sewing Information page for a list of definitions.
Craft Instructions
- Cut 2 strips 3 1/2" x 22" from red felt.
- Cut 2 strips 3 1/2" x 22" from white felt.
- Cut two 12 1/2" circles from red felt. In the center of these circles, cut out a 6 1/2" circle. You will need only one of the 6 1/2" circles for this project so put the other circle aside for another project.
- Lay one white strip on top of a red strip lengthwise. Pin in place and sew.
- Open up the two strips. Lay your other white strip on top of the red strip that has already been sewn and lay the other red strip on top of the white one that has already been sewn. Pin in place and sew.
- Lay these flat. If done correctly you should have 4 strips that alternate red, white, red, white.
- Fold in half crosswise lining up the edges and being sure that the stripes line up where they come together. Pin in place and sew.
- Place one of the 12 1/2" circles on top of the other 12 1/2" circle being sure the outer edges are lined up. Pin the outside edge in place. Sew around this outside edge. This will be your brim.
- Turn the circle right side out so the seam you just sewed is on the inside. Press the outer edge with your iron.
- Topstitch 1/4" from this outer edge of the circle.
- Baste the two layers of the inner circle of the brim together. Pin the inner circle of the brim to the right side of the white strip on the end of the tube. Sew in place.
- On the red stripe at the opposite end of the tube, run a gathering stitch and gently pull the gathering stitch so that the red stripe fits the 6 1/2" circle. Pin the circle to the red stripe and sew in place being sure your stitches are on the wrong side of the felt hat.
- Right side out and your hat is ready to wear.
Suggestion: Be unique and change the colors to suite your personality, school colors or a holiday.