
Description
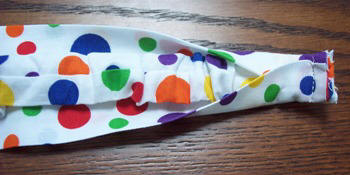
Get out your sewing machine and make a variety of headbands. This project is a great way to use some of your scrap material.
Materials and Supplies
Craft Supplies:
- Sewing Machine
- Thread
- Fabric*
- Iron
- Safety pin
- 7 1/2" piece of 1/2" wide elastic
* You need one piece of fabric approximately 15" x 8". Try using your scarp fabric.
Stitch all seams using 1/4" seam allowance.
Craft Instructions
- Cut out one headband piece** from fabric measuring 5 1/4" x 14 1/2".
- Fold this in half lengthwise with right sides together. Pin and stitch the long seam forming a tube.
- Remove the pins and right side out. Press having the seam centered on the back side.
- Cut a strip of fabric 11" long x 2 1/4" wide. Fold it in half lengthwise with right sides together. Pin and stitch the long seam. We'll call this the back piece.
- Remove the pins and right side out. An easy way to turn it right side out is to attach a safety pin at one end and push the pin through the tube. When the pin comes out the other side you will be able to just pull the rest of the fabric through itself. Press having the seam centered on the back side.
- Attach a safety pin to one end of the elastic. Make sure you close the pin. Then use the pin to thread the elastic through the back piece. Be careful not to pull the elastic all the way through.
- Line the elastic up with the raw edge of the material and pin in place. Repeat on the second end.
- Stitch across one end being sure to stitch through the elastic and have the fabric lined up evenly with the end of the elastic. Stitch back and forth across this end two or three times to make it secure. Then stitch across the other end in the same manner.
- Lay the main headband piece on your work surface with the seam facing down.
- Lay the back piece on top of the headband piece with the seam facing up. Center the raw edge of the back piece on top of the raw edge of the main piece. Then, fold the corners of the main piece in on top of the back piece in a tri-fold manner. Pin in place. Stitch securely.
- Repeat step 9 with the other two raw edges and your headband is complete!
**When I am going to make more than one of an item, I find it helpful to make a pattern out of cardboard, card stock or craft foam. Then instead of measuring each time to cut out the pieces I simply trace around the patterns I have made.