Description
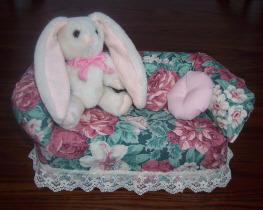
This unique doorstop is crafted from an ordinary brick, fabric and batting and will add decorative charm to any home while serving it's practical purpose of holding the door open.
Materials and Supplies
Craft Supplies:
- Brick
- Batting - 2 pieces 13" x 12" *
- 1/4 yard Fabric
- Small amount (approx 5" square) contrasting fabric
- 26" length of lace 1" wide in a coordinating color
- Polyester Fiberfil
- Needle & thread
- Sewing machine (optional)
- Hot glue gun
- Small teddy bear or other animal
*If the batting you use is very thick, one layer is fine
Refer to the printable page for many more photos which will aid you in completing this project.
Craft Instructions
1) Cut out two pieces of batting to measure 13" x 12"
2) Lay the batting pieces one on top of the other. Treat both pieces of batting as if they were one, but when you glue them be sure they both get glued in place.
3) Center the brick on top of the batting. Bring one long side of the batting to the center of the brick and glue in place.
4) Bring the second long side of batting to the center of the brick and glue in place. It is OK if it overlaps the other batting.
5) On the two ends, you will need to cut away some of the extra batting. Please refer to the picture on the printable page. What you want to be left with is one flap of batting which will just cover the end of the brick.
6) Glue the batting in place on the two ends of the brick.
7) Cut a piece of fabric 6 1/2" x 16" which will form the back/arm rest and cut a piece of fabric 15" x 13" to cover the brick.
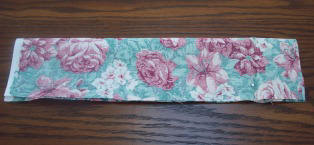
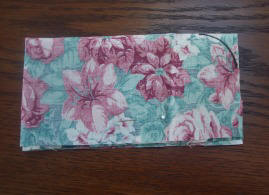
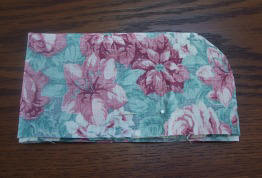
8) Fold the 6 1/2" x 16" piece of fabric in half lengthwise right sides together (fig 8a), and pin in place. You will need to cut the two corners on the fold side so they are rounded. To make them even, fold the fabric in half crosswise (fig 8b) and make one rounded cut, cutting off both corners at one time (fig 8c). Then, unfold the last fold you made. It should look like step #8d pictured below.
Figure 8a
|
Figure 8b
|
Figure 8c
|
Figure 8d
|
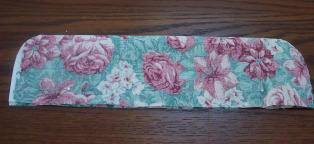
9) Sew all the open edges closed (do not sew the folded edge) leaving a 1 1/2" opening in the center of the long straight side. Clip corners and curves. Turn right side out. Stuff with Polyester Fiberfil and sew the opening closed (either by hand or with a sewing machine) Set aside for the moment.
10) Lay the 15" x 13" piece of fabric right side down on your work surface. Place the brick (which is covered with batting) in the center of the fabric with the batting seam facing up.
11) Bring one of the long straight sides of the fabric up and over the brick. It should reach approximately the center of the brick. Glue in place. Bring the other long straight side up and over the brick in the same manner only fold the long edge under about 1/2" before bring up and over. The second piece of fabric should overlap the first one. Using your hot glue gun, glue the fabric in place.
12) Keeping the brick flat on your work surface, fold the fabric on the ends as you should when wrapping a gift. Hot glue in place.
13) Turn the wrapped brick over so that the long seam is on the bottom. Glue the lace all the way around the brick on the lower portion of the sides of the brick. When gluing, glue the straight edge of the lace so that the scalloped edge rests just above your work surface. Also, your stop and start points with the lace should be on the center of one of the long sides. That long side should become the back of your sofa.
14) Now, attach the back/armrest you made in steps 8 and 9. To attach it, lay the brick on your work surface with the long seam facing down. Run a bead of glue along both short sides and one long side on the top face of the brick and place the arm/backrest into the glue. Before you press it into the glue, hold it slightly above the glue and line it up, simply folding it where it needs to go around the corners.
15) Next, you'll need to make two pillows. Cut out one circle with a 4 3/4" diameter from a contrasting fabric and one from matching fabric.
16) With one of the circles and a needle and thread, do a running stitch around the perimeter of the circle close to the edge. Pull the thread to gather the circle closed but as you do, put some Fiberfil into the center of the circle. Pull the thread until the opening is closed and knot it off but don't cut the thread yet. Take two or three stitches through the center of the pillow. Take each stitch on top of the previous one. Knot off and cut the thread.
17) Repeat step 16 with the second circle.
18) Using your hot glue gun, glue the two pillows and the stuffed animal onto the sofa.
Optional: If your stuffed animal doesn't come with a nice ribbon around it's neck, tie one on in a bow.