Description
This picture frame craft project is easy for kids to make and give as a gift for Mother's Day or Father's Day. Also, makes a great Christmas present!
Check out our Hints & Tips section for hints on working with glitter.
Materials and Supplies
Craft Supplies:
- Disposable ashtray (sold at party supply stores)
- Photo
- Small glass beads
- Gel DipTM or Glitter
- White glue
- Glue stick
- Paintbrush or popsicle stick
- Small piece of cardboard (1 1/2" x 2")
Craft Instructions
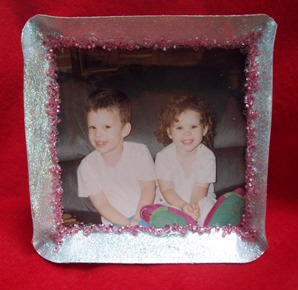
- Choose a picture which can be cut to fit the bottom of the ashtray. It is OK to cut away some of the background but your main subject should fit within the size of the bottom of the ashtray. The bottom of my ashtray is 3 1/8" square so I cut my picture to that size.
- Using a glue stick, glue the picture right side up on the ashtray.
- Cut a 1 1/2" x 2" piece of cardboard* for the stand. Make a bend in the cardboard approximately 1/2" from one of the 1 1/2" ends. Apply glue to this 1/2" section and attach it to the back of your ashtray (frame) being sure that when you stand the frame up the picture is right side up. Let glue dry completely. Glue dots or hot glue can be used to eliminate the wait for drying.
- Lay your frame flat on your work-surface face up. If using Gel DipTM, apply it with a popsicle stick or paint brush to the rest of the ashtray slightly overlapping the edge of the picture. While the Gel DipTM is still wet, press small glass beads into it just around the edge of the picture........or..........if using glitter, spread a layer of white glue on all the inside edges of the ashtray and on the very edges of the picture. Press small glass beads into the glue around the border of the picture then, sprinkle the rest of the glued area with glitter. Shake off any extra glitter. Let glue and/or Gel DipTM dry completely before standing up picture frame.
*You can cut the cardboard stand from another ashtray if you have extras.