Description
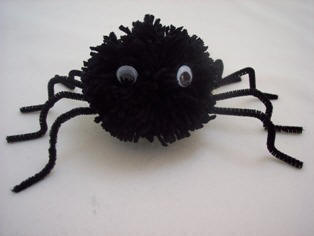
Our creepy crawly spider decoration is fun and easy to make from yarn and pipe cleaner.
Materials and Supplies
Craft Supplies:
- 4 Black pipe cleaner
- Black worsted weight yarn
- Two 15mm googly eyes
- White glue
- Elastic thread - optional
- Piece of cardboard 5 1/2" wide*
*I use a Reader's Digest Magazine instead of cardboard to wrap the yarn around.
Idea: If you don't want to make the pompoms you can use large pre-made pompoms and hot glue them to the pipecleaner legs.
Craft Instructions
- First you need to make a large black pompom. To do that, wrap the black yarn around a piece of sturdy cardboard that is approximately 5 1/2" wide. You will need to wrap the yarn approximately 200 times around to get a pompom that is full enough. Cut the yarn connecting the wrapped yarn and the rest of the yarn. When wrapping the yarn around the cardboard, be careful not to pull it too tightly. You do not want the cardboard to curl up under the yarn.
- Cut a piece of yarn about 15" long and lay it flat on your work surface. If you want to hang your spider, at this point you would cut an 18" piece of elastic thread and lay it horizontally across the 15" piece of yarn.
- Slide the wrapped yarn off of the cardboard and lay it across the cut piece of yarn (in the same direction as the elastic thread).
- Tie the yarn tightly around the center of the wrapped yarn and knot it. Leave this piece of yarn long.
- If making a hanging spider, at this point pull the elastic thread towards one side leaving just enough so you can knot it around the piece of black yarn. Tie the elastic thread in a secure knot around the black yarn. When your spider is complete you can tie the other end where ever you would like your spider to hang from.
- Cut the loops being careful not to cut the elastic thread or the long black yarn you used to tie the loops.
- Trim the ends of the yarn until you have a nice even looking pompom being careful not to cut off the long yarn you used for tying the loops. Set aside for the moment.
- Lay the four pipe cleaner next to each other so that the ends are all even. Twist the center of the pipe cleaner together then fan the pipe cleaner out as pictured.
- Place the center (where you twisted them together) of the pipe cleaner on top of the pompom where the long black piece of yarn is. Knot the long black yarn around the pipe cleaner thus attaching the legs to the body. Now, cut off the extra black string.
- Bend the legs as pictured and glue on a pair of googly eyes.
|
|
|
|
|
|
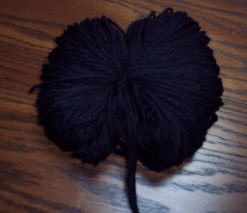 Knot a 15" piece of yarn around the center of the yarn loops.
 Use scissors to cut the loops.
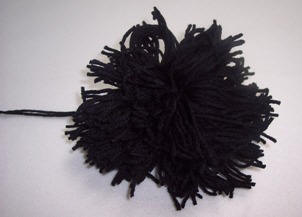 Your pompom before trimming.
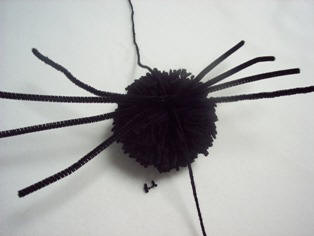 Lay the pipe cleaners across the pompom on top of the long piece of yarn.
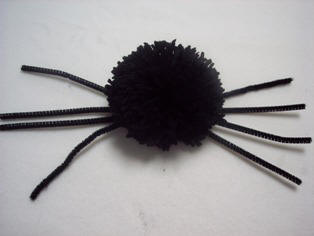 Tie the long piece of yarn around the pipe cleaners and fan the pipe cleaner out.
 Bend the pipe cleanr to form legs and glue on googly eyes.