Description
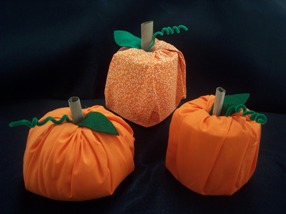
This simple Halloween craft will leave children feeling very successful upon completing it. Our calico pumpkin was made by Anna, age 5, of Methuen, Massachusetts.
Materials and Supplies
Craft Supplies:
- Fabric 22" square, solid orange or calico
- Green felt 5" x 2 1/2"
- Craft paper 3" x 6" *
- 1 Green pipe cleaner
- Glue stick
- Roll of toilet paper; the full roll not just the tube
- Pencil or round chopstick
* If you don't have craft paper, use a paper bag
Craft Instructions
- Lay a 22" square of orange fabric right side down on you work surface.
- Place a full roll of toilet paper in the center of your fabric square.
- Working your way all the way around the toilet paper, neatly tuck the fabric into the center of the toilet paper roll.
- Cut a 3" x 6" piece of craft paper. Starting at one of the 3" ends, roll the paper to form a tube which will be you stem. Run a glue stick across the other 3" end before you finish rolling the craft paper to secure it in place.
- Using the leaf pattern provided, trace and cut out one leaf from green felt.
- Lay the stem on top of the leaf. Securely wrap one end of the green pipe cleaner around both the stem and the leaf. Curl the other end of the pipe cleaner by wrapping it around either a pencil or chopstick, then slide the chopstick/pencil out.
- Place the end of the stem/leaf piece into the center of the roll of toilet paper and your pumpkin is ready to display.
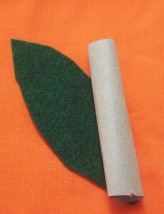 Lay the stem on top of leaf |

Attach the stem and leaf together with a pipe cleaner |
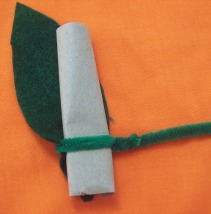 Twist the pipe cleaner securely. |
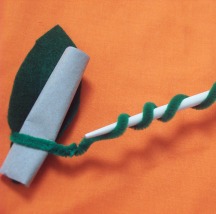
Wrap the pipe cleaner around a chopstick to create a vine. |